
One of the most common questions we get asked is “how do I set up my road bike for triathlons?” This great question stems from a large number of people who want to be more competitive in Triathlon but also don’t want to make the multi-thousand pound investment in a specific Triathlon bike. We have a blog post here on how and why you would convert your road bike to a Triathlon bike. In this post we’ll talk about dialing in your position for triathlons on your road bike.
To fit your road bike for triathlon you’ll need the following:
Aerobars and a saddle you are comfortable on in the aero position
From experience we recommend aerobars from ControlTech and ISM saddles as good starting points but any Aerobar that has a wide range of adjustability and saddle that you find comfortable will do.
Keep in mind that a saddle you are comfortable with in the road position might not necessarily still be comfortable in a more aggressive Triathlon position
A measuring tape
Wax marker or sharpie
Electrical tape
In this post we’ll assume you are wanting to have separate setups for road and triathlon. There are a few reasons for this, but the primary one is most group rides won't let you participate with aerobars installed. If you never plan on removing your aerobars or going back to a more traditional “road” position then you can consider skipping to the final two steps of installing and dialing in your fit on your aerobars.
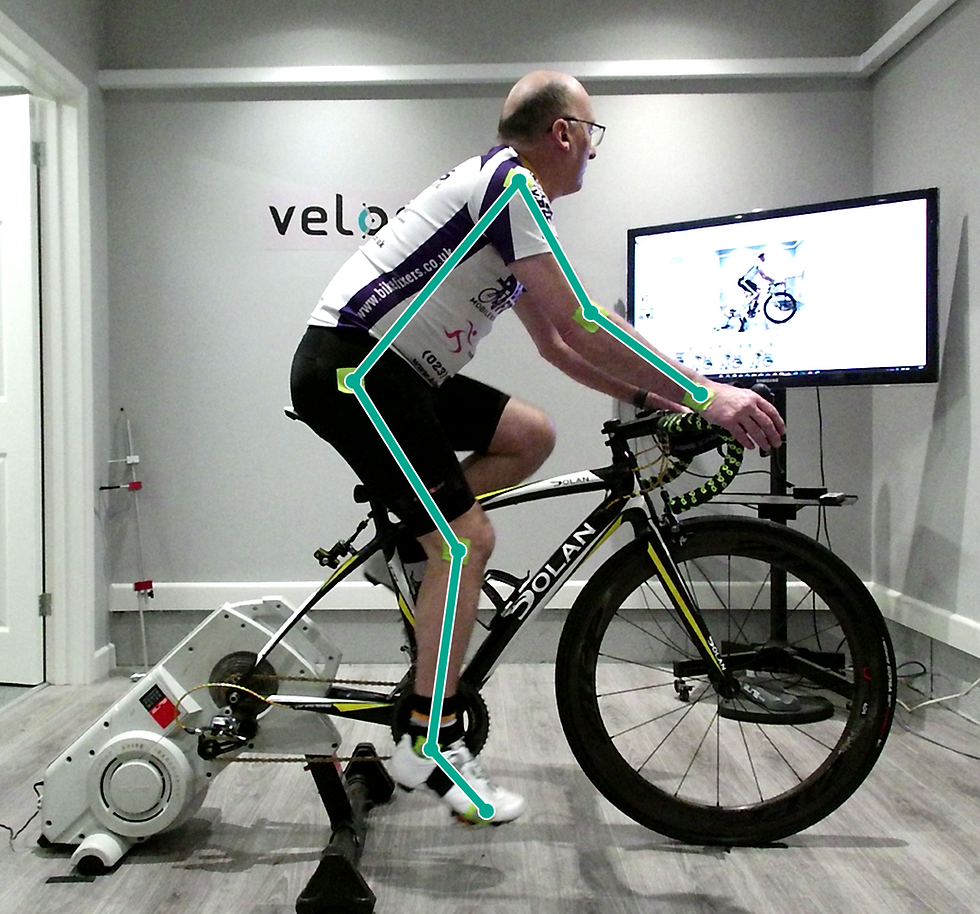
The first step in this process is to make sure you are comfortable with your road bike fit. If you are 100% happy with your current position we still recommend booking a Bike Fit Consultation Session with Performance BikeFit so we can check the position and give you information on how you fit your bike. If you aren’t 100% happy with your Road Bike position then you’ll definitely want to Book Yourself in for one of our Performance BikeFit Sessions.
Once You've have your Bike Fit you will get a Detailed Report on your body position and the coordinates of your bike's touch points. Your body position is automatically saved as a collection of joint angles in your fit session.
It's good to have a record of your body angles as well as touch points and these are all included in your Bike Fit Report. If you are Happy with your position by yourself, In addition to recording your position we also recommend you mark your bike. We actually always recommend doing this, but especially if you are changing positions/settings often. It makes it a lot easier to quickly ensure you are in the right position without having to pull out the measuring tape. You can mark your bike with either a wax pencil, electrical tape or a sharpie. Because at this point we don’t know how many changes you’ll have to make, we suggest you mark everything that could possibly change, such as seat height, seat fore/aft position, stem height, and handlebar rotation. A simple trick to mark rotation on things like stems and aero bars is to put a mark where the component lines up with the gap on the clamp so when you need to match rotation just make sure the mark you added lines up with that gap and you are set.
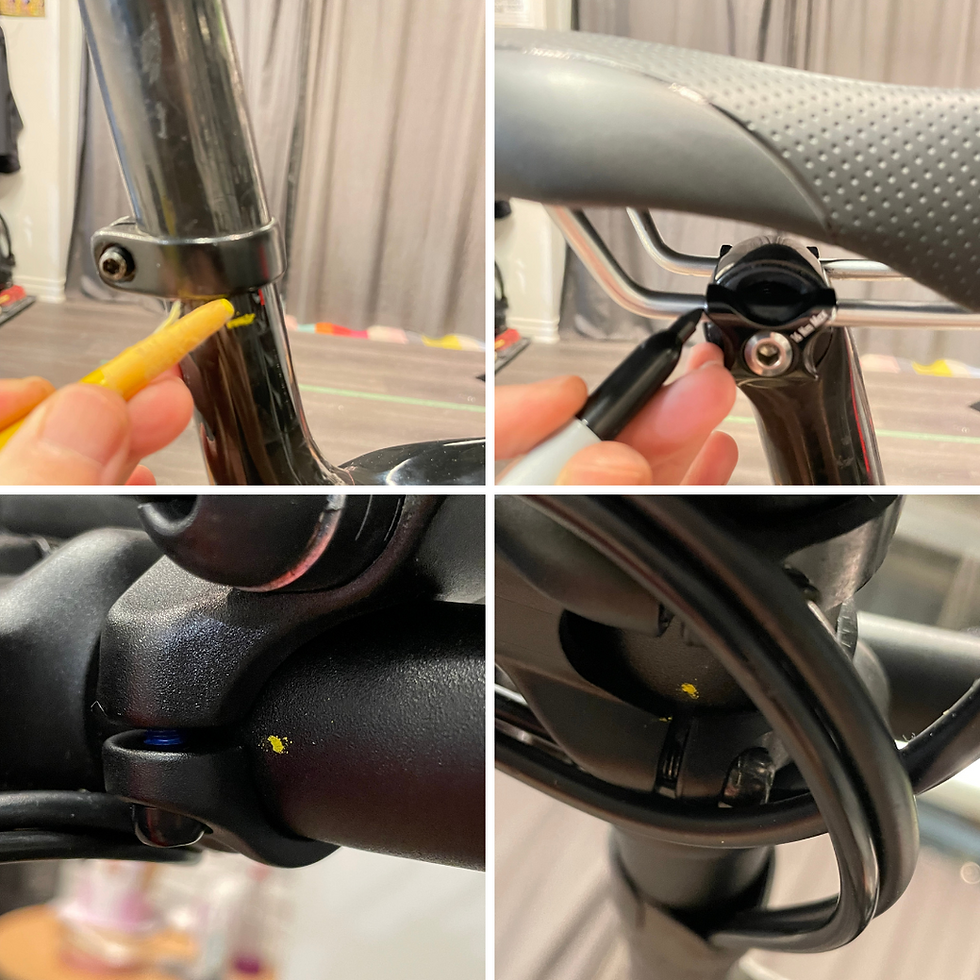
Mark your position with a wax pencil, permanent marker, nail polish, or electrical tape.
Adjusting the Triathlon position
Generalizations in bike fit are traditionally a bad idea, but from years of experience when setting up a road bike with aerobars for triathlon you’ll likely need to make these adjustments:
Raise the aerobars
Move saddle forward
Raise saddle (if you are changing to a ISM Saddle you may need to lower it to take account of the increased stack height of the ISM Saddles. )
Assuming you fit the generalization, you are likely going to start by raising your aerobars. Since you have your road position marked, you can start by raising the stem (assuming you have room). If you don’t have room to raise your stem you will need to look into purchasing aerobar spacers for your brand of aerobar. On the saddle side, now that you have your aerobars on you’ll want to identify if you find your existing saddle comfortable in the aero position and if you can get into the correct position over the cranks with it. One of the benefits of “Triathlon” specific saddles is that they allow for a more forward seating position. Keep in mind, you may need to swap to a zero offset seatpost in order to get the saddle position correct. The photo below shows a rider’s road position on the left and their triathlon position on the right. Note the higher stem, less offset seat post, and an ISM saddle in the triathlon setup.
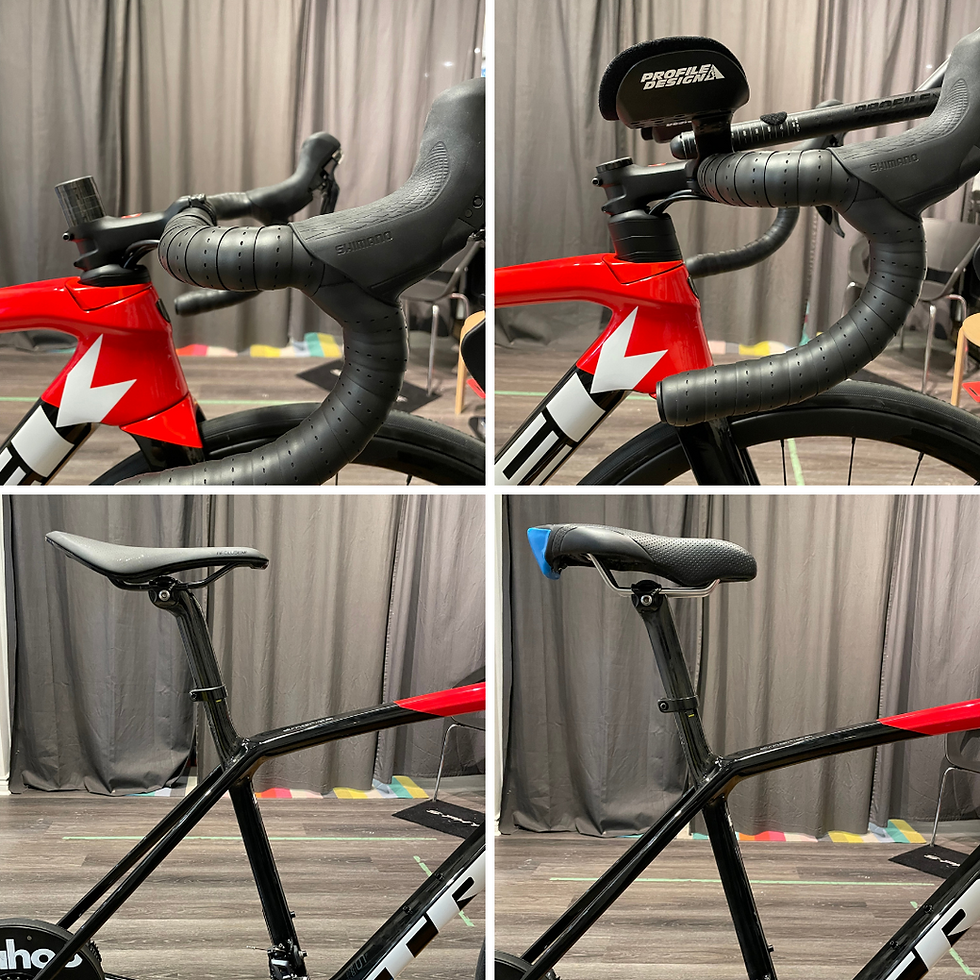
A Trek Emonda setup for both Road and Triathlon riding
Just like with your road fit you’ll want to spend some time riding in this position to adapt. If you are not used to the aero position it can take quite a while until you’ve adapted enough to be able to spend significant time on your aerobars.
Now that you are confident that you are happy with your aero position, you’ll want to record this position and mark it just like with your road position. This will allow you to switch back and forth
Some tips to help transition to the aero position:
Ease into riding on the aerobars if you aren’t used to them. A common approach is to start with 5 minutes in aero followed by 10 minutes out of aero and add 5 minute “sets” in aero every week while decreasing the amount of rest every two weeks. Depending on the length of your triathlon you’ll want to be able to spend 20-60 minutes at a time comfortable in your aerobars without a break.
If you don’t ride on the aerobars in training, you won't ride on them in racing.
If you don’t use your aerobars >80% of the time during your race, it’s not worth having them - the drag they reduce while in the aero position isn’t worth the added weight and drag they produce while not in the aero position. This is especially true on hilly or technical courses.
If you are using aerobars on an indoor trainer it’s important to still train your neck muscles by looking at where the road would be and not cheating by setting a monitor or tablet below the aerobars to watch while you ride - this is a classic cause of riders being comfortable on the trainer but not on the road.
But of Course after all this your are not comfortable with your Aero Triathlon Position or Confident that you could do the Changes yourself then just Book Yourself in for a Performance BikeFit for your Triathlon Position on your Road Bike, you will then have 2 Sets of Data so you can swap back and forth from your Road Setup to Your Triathlon Setup on the Same Bike.
Many Athletes have used Performance BikeFit to improve their cycling position. Whether you are a veteran or new to the sport, Performance BikeFit can help you improve your position and improve your enjoyment of cycling indoors and Out.
© 2023 Performance BikeFit
Comments